Learn how to use a sequential-style workflow to route a workflow to multiple level depending on the course the workflow takes.
Summary
Demonstrates how to use a sequential -style workflow to route a workflow to multiple levels depending on the approval status. It also creates a subsite using a custom activity after approval by all level.
This basic workflow scenario supports a review and approval/reject process. The workflow starts when a list item is submitted. The workflow assigns a task to first level user group, who review the request, makes comments as necessary, and then concludes the task by either approving or rejecting the request. The workflow ends when the request is rejected. Additional tasks are assigned to the second level user group after approval from first level. On rejection, the workflow ends and on approval, a new subsite is created using the custom code activity added in the workflow.
Prerequisites
This sample requires the following:
- SharePoint 2013 installation that is connected to a configured Workflow Manager 1.0 farm.
- Workflow Manager 1.0 that has the March 2013 cumulative update applied.
- Service Bus 1.0, with the Mach 2013 cumulative update applied.
- Visual Studio 2013 and Office Developer Tools for Visual Studio 2013
- Start following services
- Service Bus Gateway
- Service Bus Message Broker
- Workflow Service Backend
Key components of the sample
- CPApprovalWorkflow.sln contains the entire workflow.
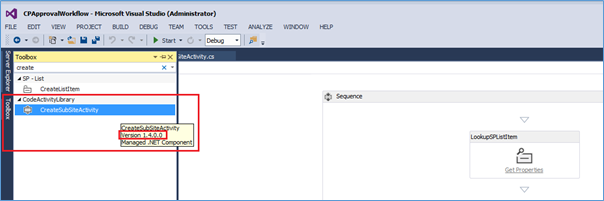
- CodeActivityLibrary.csproj contains the solution to add custom workflow activity that is used by the workflow
- The feature folder contains the feature that adds workflow to the list.
Configure and build the sample
Follow these steps to configure the sample.
- Make sure that you have a site collection created using the Developer Site template.
- Create two SharePoint user groups named Legal Dept Members and Managers
- Open the solution Visual Studio 2013.
- Change the Site URL property on the project to be the URL of the developer site.
- Build CodeActivityLibrary.csproj and copy the CodeActivityLibrary.dll and AllowedTypes.xml to following locations
- C:\Program Files\Workflow Manager\1.0\Workflow\Artifacts
- C:\Program Files\Workflow Manager\1.0\Workflow\WFWebRoot\bin
- GAC
- Build ApprovalWorkflowApp.sln.
Run and test the sample
- Open CPApprovalWorkflow.sln, set the library/list GUID in the Elements.xml file for the list to which the workflow need to be added along with Workflow History List ID and Task List ID.

- Build and deploy the solution to a developer site.
- When the solution is deployed, open the site and list to which the workflow is added to.
- Make entry in the list and submit.
- Navigate to the Task list and edit the newly created item to approve the request. (1st level)
- Check the Workflow log list to view the status of workflow
- Navigate again to the Task list and edit the item to approve (2nd level)
- Navigate to the Site Contents page to verify if the subsite is created successfully after approval of workflow
- If there is any change in the CodeActivityLibrary.csproj project, make the changes, move the CodeActivityLibrary.dll and AllowedTypes.xml to following locations, reopen the Visual Studio and add the activity again in the workflow.
- C:\Program Files\Workflow Manager\1.0\Workflow\Artifacts
- C:\Program Files\Workflow Manager\1.0\Workflow\WFWebRoot\bin
- GAC
- It’s recommended to change the Assembly version each time when there is a change in code activity library to make sure that the latest change is updated.

Troubleshooting
If the workflow fails, it is likely due to following reasons:
1. Prerequisites are not installed properly
2. GUID is not correct
3. User groups are not created
Go to workflow page to check the error message.
Screen shots
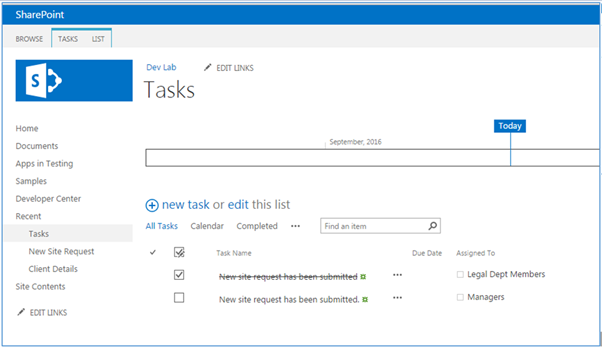
New Site Request List (where the Workflow is added to)
 Workflow page of New Site Request list. Workflow started after the list form is submitted.

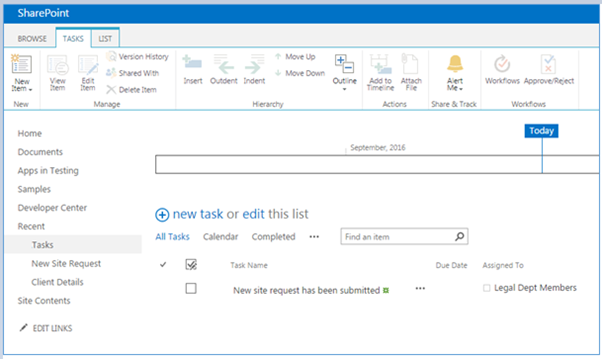
New task has been created and task is assigned to Legal Dept Members group
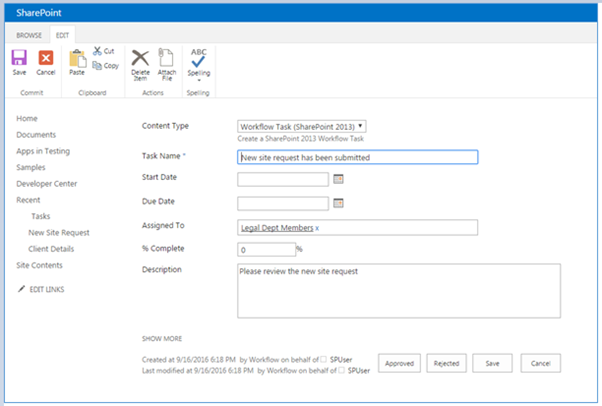
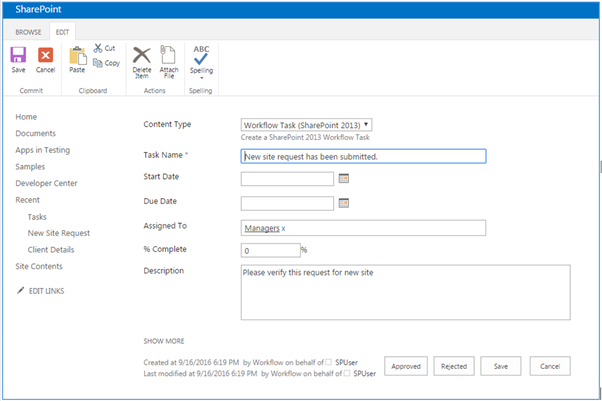
Edit the task and approve/reject the request.
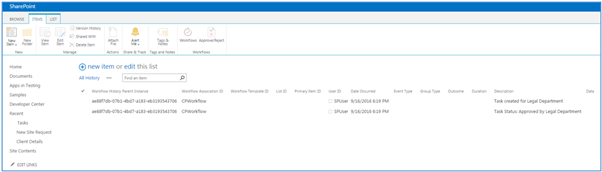
Workflow History with status logged in.
New Tasks has been created and assigned to Managers group
 Edit and approve/reject the request (2nd level)
Workflow History with status logged in.

Subsite created after 2 level of approvals

No comments:
Post a Comment